Connection Guide
Tools to Acquire
Before trying to connect, it is recommended to understand and install the needed tools below:
- Text/code editor
- Visual Studio Code Download (VS Code) is recommended as all of the steps in this guide can be completed in it, especially since it has access to extensions.
- Secure File Transfer Protocol (SFTP) client (free versions)
- Remote FS Download is a recommended built in VS Code extension for SFTP (Tip: If the lab computer does not have an installed SFTP client, get this extension instead)
- FileZilla Download or WinSCP Download are recommended if a graphical user interface is wanted to navigate the Students webserver.
- Command-Line Interface (CLI)
- Command Prompt (Windows), Terminal (OSX), or Bash (Linux) are examples of CLI and each should be natively installed on their respective local computers.
1. Connecting to the VPN
In order to access a file directory on the Students webserver via SSH/SFTP, users must be connected to the UCF Virtual Private Network (VPN). Installation and connection instructions can be found in the UCF Virtual Private Network (VPN) Access knowledge base article.
Once you have successfully connected to the VPN, you can SSH into the Students Webserver, in a CLI, using the template command below, to see that your directory was created. Your NID password will be required.
ssh *User*@net5046.net.ucf.edu
2. SFTP Client Operations
Follow the guide that corresponds to the client chosen to connect to the Students webserver.
Remote FS
- Complete the Setup instructions in the Remote FS Download page, along with the steps here. VS Code is required and the extension installed before using this method.
- The information for Step 2 found in The Students Webserver section, input the settings from the code snippet below and save the file.
- Type 'remotefs.remote' directly into the Search Settings bar and the click on 'Edit in settings.json' for the User tab.
- Replace all starred information with the relevant values for you.
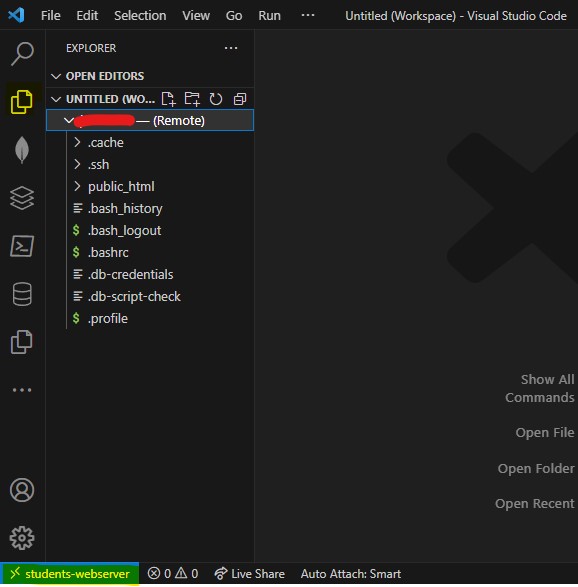
- Once all the Remote FS Setup steps are complete, notice that the connection will be indicated at the bottom blue bar of VS Code. If that is displaying with the correct server name, from Remote FS profile, the VS Code Explorer tab can be used to navigate your database.
- Exit the connection by going to File>Close Workspace
  "students-webserver": {
    "scheme": "sftp",
    "host": "net5046.net.ucf.edu",
    "username": "*User*",
    "password": "*Password*",
    "rootPath": "/home/ad/*User*"
  }

FileZilla
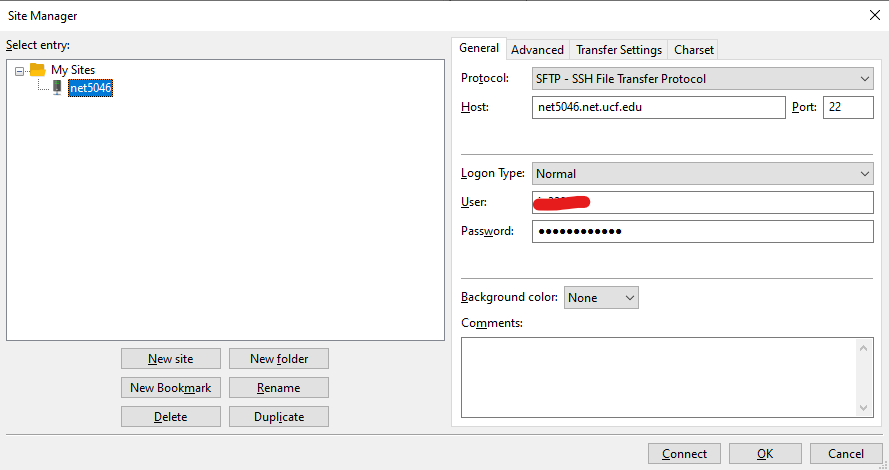
- Once FileZilla is open, go to File>Site Manager..., click 'New site', give it a name, change the 'Protocol' to SFTP, and set the 'Logon Type' to Normal. The rest of the info can be found in the The Students Webserver section.
- The 'Open the Site Manager.' drop-down button, under File, will allow for quick connection; after the site is created.
